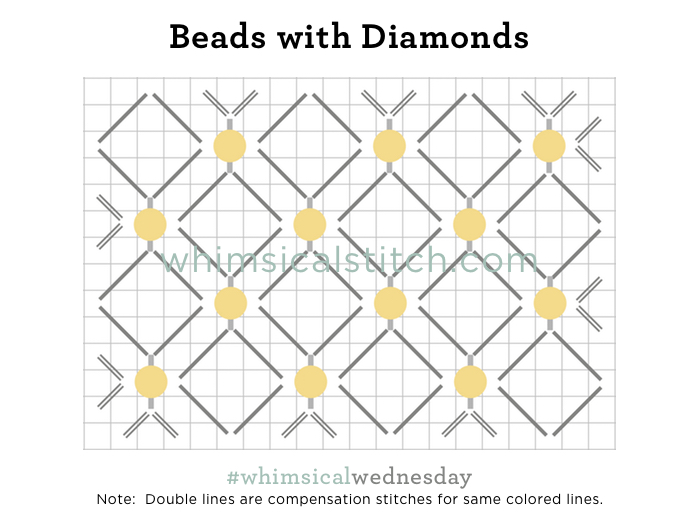
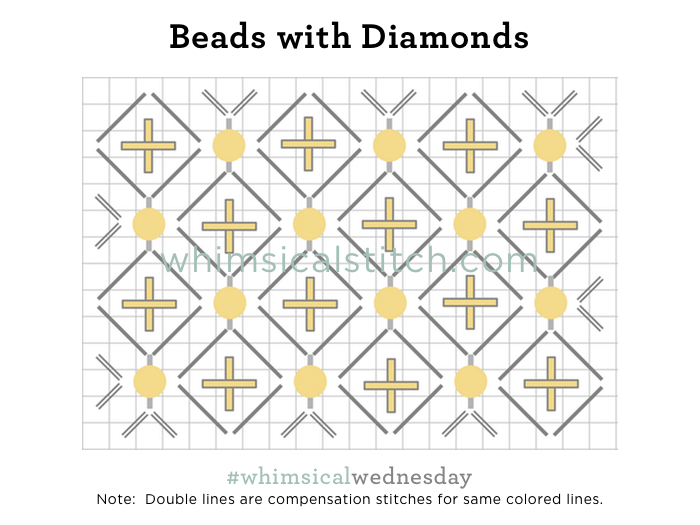
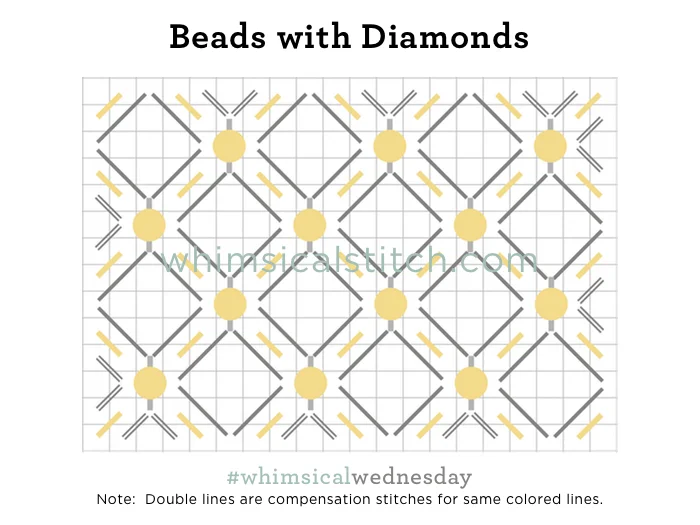
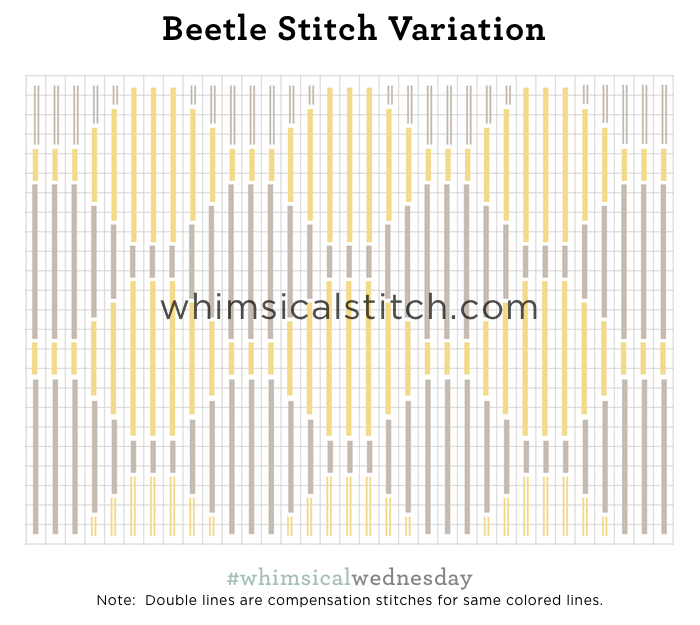
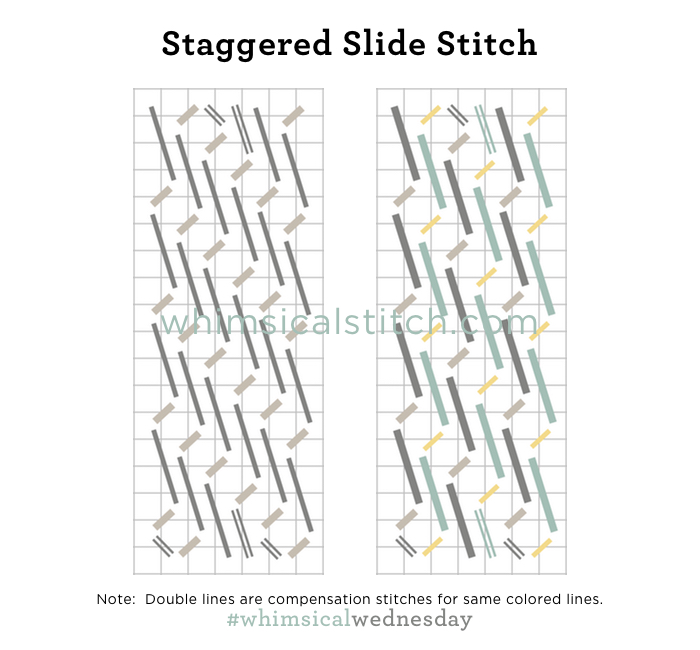
Virtually any darning stitch can work for snow. I favor straight darning stitches and today's stitch is a recent favorite. (Here is a refresher on darning stitches.)

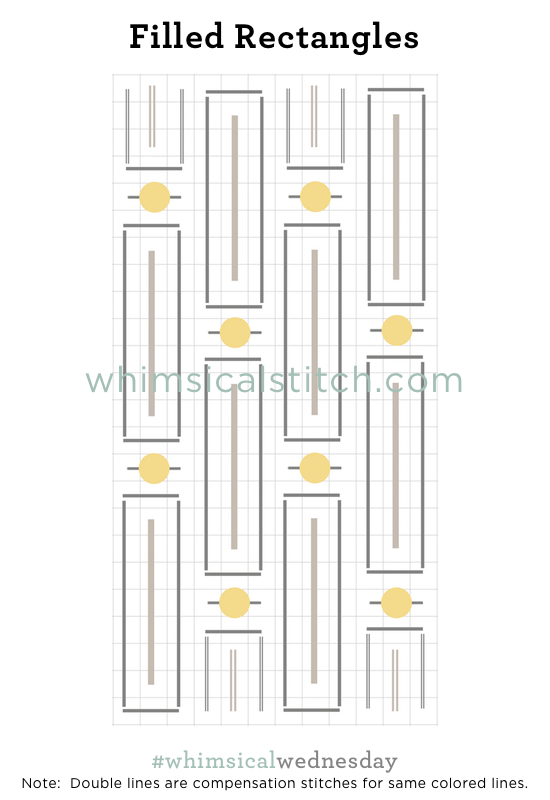
The gaps in the row with stitches over three rows are a great opportunity to show off any shading. Remember to always start from the far side of any row. The diagram starts on the left side.
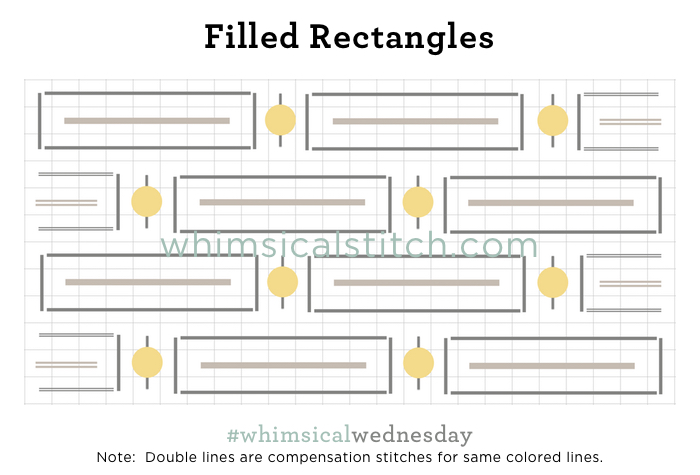
While neither stitched sample on Instagram is snow, they are ground covers and are great examples of how this stitch works. The first is a dirt path on a J. Mahalay piece. The second is the sand from Melissa Shirley's Beach House.

52 Likes, 0 Comments - whimsicalstitch.com (@whimsicalstitch) on Instagram: "5-3 Darning Stitch with ThreadWorx wool (on 18-mesh) for today's snow stitch on..."

32 Likes, 0 Comments - whimsicalstitch.com (@whimsicalstitch) on Instagram: "5-3 Darning Stitch with DMC Pearl Cotton #8 (on 13-mesh) for today's snow stitch on..."
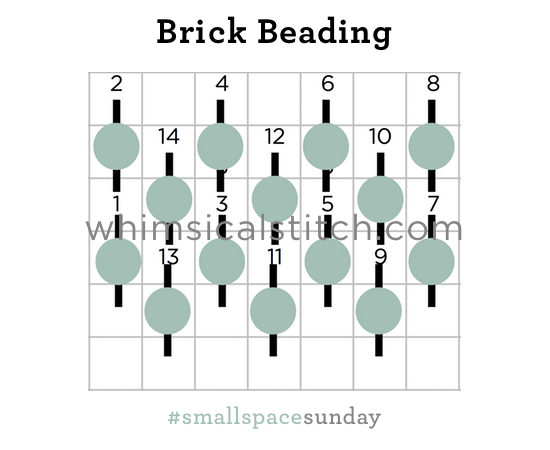
This stitch diagram, along with other #whimsicalwednesday and #smallspacesunday stitch diagrams, can also be found on a Pinterest board (dedicated to whimsicalstitch.com stitch diagrams).
Be sure to follow whimsicalstitch.com on Facebook, Pinterest, Instagram, and Twitter.
If you like what you see on this blog, want to learn some very creative decorative stitches, and how to put them all together, whimsicalstitch.com sells stitch guides for seasonal Melissa Shirley designs. 27 guides are currently available and more are in the pipeline.
Enjoy!