

We wrap up the month of snow with some thought-starters on spacing. Let's start with the Elongated X.
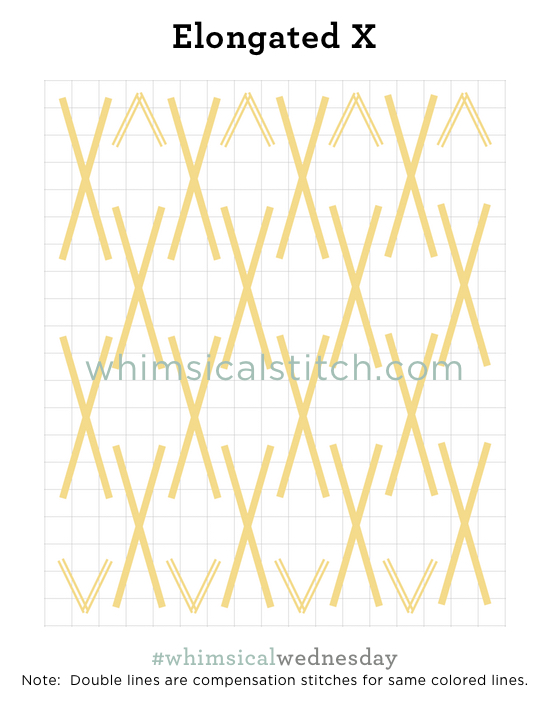
It's straightforward, fills a large space quickly, allows the beautiful shading to show through (especially for snow), and doesn't overpower an area.
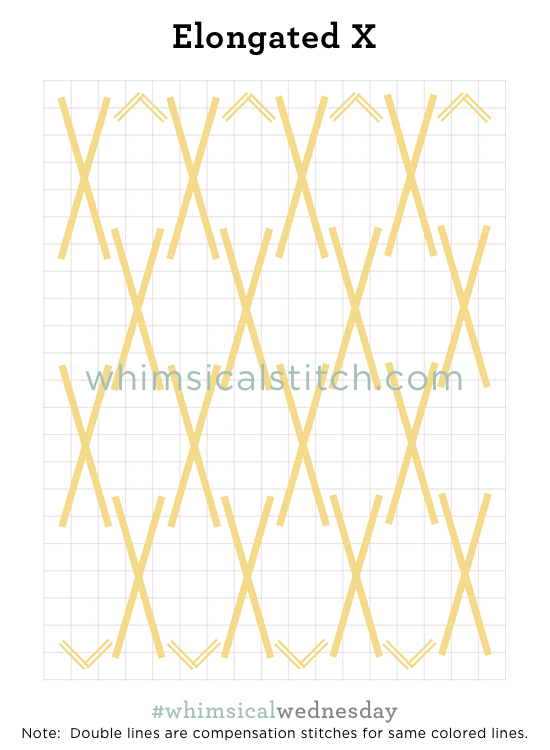
What if we moved the X's one row up?
It gets really fun when you incorporate beads. Here's the first version with a bead in the open area. (And remember, my diagrams use color for clarity! For snow, I recommend a white metallic with a white, clear, or translucent bead. It's a little challenging to distinguish white on white on a diagram.)
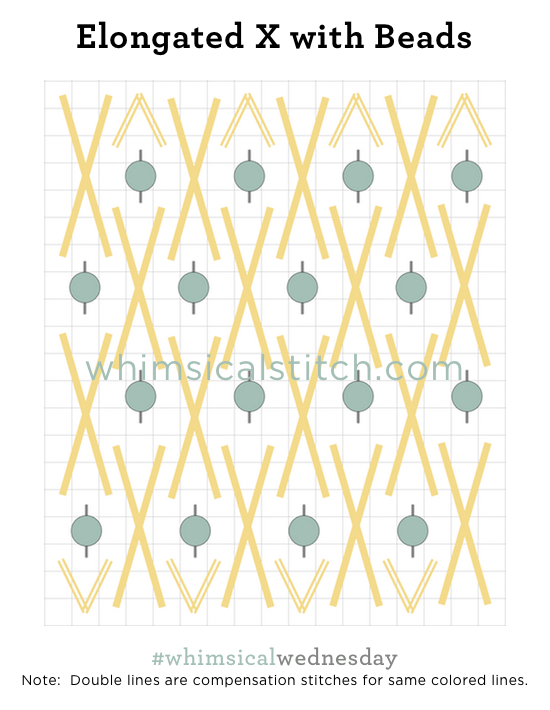
So, here is where I usually talk about mesh sizes and bead sizes. The traditionalist in me would typically say size 14/15 beads on 18-mesh and size 11 beads on 13-mesh. But here's the thing. This is snow and it's fun. The space between the X's in the above example is a good size with potential. Have fun with it! Depending on the area, consider using size 8 beads! Or even size 6 if you want it to really pop!
Speaking of popping, here's a fun addition to the second Elongated X. Bugle Beads!

You may want to also consider stringing 2-3 beads on a needle and adding those on the vertical. There are so many possibilities. The space you are stitching and your personal preferences will dictate the best way.
These stitch diagrams, along with all other #whimsicalwednesday and #smallspacesunday stitch diagrams, can also be found on a Pinterest board here.
Be sure to follow whimsicalstitch.com on Facebook, Pinterest, Instagram, and Twitter.
If you like what you see on this blog, want to learn some very creative decorative stitches, and how to put them all together, whimsicalstitch.com sells stitch guides for seasonal Melissa Shirley designs. 28 guides are currently available and more are in the pipeline.
Enjoy!