Baby Bling

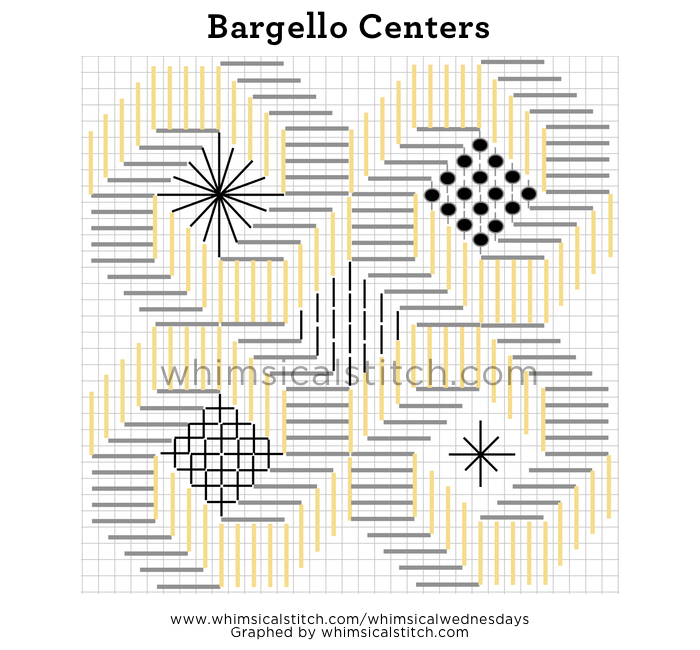
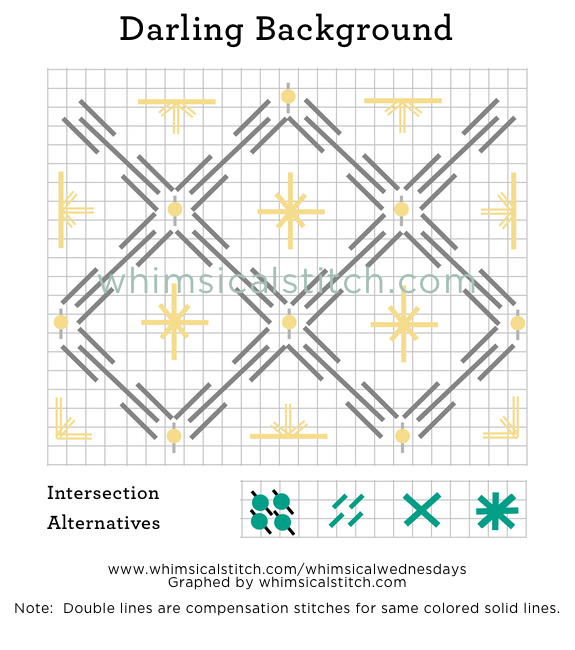
As you may have noticed, I use very fancy, technical terms for stitch concepts.  Darling (for sweet stitches), Bling (fun dressy stitches with at least one metallic thread or bead), Trifecta (classy stitch with an element of three of some kind).  Today's #smallspacesunday features a Baby Bling stitch.  It's the clever combo of an upright cross stitch and a bead.

This stitch is great for any small space requiring more than a splash of excitement.  The beads are a nice surprise in this stitch, adding elegance and glamour.  What I also really like about this stitch is its inherent openness, allowing shading to show through.

Baby Bling Stitch.jpg

Since this is a bling stitch, I wholeheartedly encourage using a metallic for the Upright Cross.  If you want the beads to pop more, do the Upright Cross in a matte thread.  I've seen this stitch used as a flower petal, a lemon (as seen on the stitched sample on Instagram), and a roof.  It's truly versatile...yet the common denominator is a small space.

Speaking of the stitched sample, it uses a Kreinik Metallics Fine Braid (#8) and a #11 Sundance Bead.  It is a very light application of this stitch.  Consider a heavier metallic and larger bead if you would like the area to pop even more.  

This stitch diagram, along with other #whimsicalwednesday and #smallspacesunday stitch diagrams, can also be found on www.pinterest.com/whimsicalstitch/whimsicalwednesday.  

Be sure to follow whimsicalstitch.com on FacebookPinterestInstagram, and Twitter.

If you like what you see on this blog, want to learn some very creative decorative stitches, and how to put them all together, whimsicalstitch.com sells stitch guides for seasonal Melissa Shirley designs.  18 guides are currently available and more are in the pipeline.

Enjoy!

Pumpkin Pie

Today's stitch was chosen because, well, it's from a pumpkin I stitched more than a few years ago...and it's Thanksgiving Eve.  And a very happy Thanksgiving to all!  I'm very grateful for your support and input as I got this little labor of stitching love off the ground this year.

The stitch is called Bargello Circles.  It's a great large space stitch for an area you want to draw attention to.  It is a complex stitch yet, once you identify patterns, it becomes manageable.

Bargello Circles.jpg

Seeing this stitch in context is very helpful and the stitched sample is on Instagram.  Let's break down the stitch into sections to help it make sense.  Each circle is made up of four separate crescents.  

Bargello Crescent.jpg

What makes the crescents so easy is all of the stitches, whether horizontal (the gray lines in the first diagram) or vertical (yellow lines), are over four rows.  Each "section" of the individual crescents making up a circle is five rows wide, with a shared row on either side of the middle section.  

I find it best to have two needles threaded at the same time.  Create one circle at a time, adding each of the four crescents in the order most comfortable for you.

The center of each circle is where the fun begins.  As I mentioned earlier, this stitch commands attention.  You can moderate that attention through whatever you do in the centers.  The diagram below offers five different scenarios.

Starting in the upper left corner,

  1. Use long stitches to create a spiral

  2. Add beads in the Brick Beading style (one bead over two rows on the vertical)

  3. Brick stitch on the vertical (center diagram; also on the Instagram stitched sample)

  4. A tied Cross Stitch in the center, with a small amount of exposed canvas to allow shading to show through (lower right)

  5. Upright Crosses (lower left)

I do not recommend any sort of diagonal stitch, such as Plain Needlepoint, for the centers.  The crescents and resulting circles are horizontal or vertical straight stitches and I believe the direction they established should be maintained.

I tend to use matte threads with similar color values for the crescents and a metallic in the center.  Think Silk & Ivory, Pepper Pot Silk, or Vineyard Silk for the crescents and a Rainbow Galleries metallic, such as Frosty Rays, for the centers.

If you want to really make this stand out, use two contrasting colors for the crescents, such as red and purple or black and white, with a gold, silver, or white metallic in the center.  Be warned...that will be a very dramatic stitch.  And, for some pieces, absolutely perfect!

These stitch diagrams, along with other #whimsicalwednesday and #smallspacesunday stitch diagrams, can also be found on www.pinterest.com/whimsicalstitch/whimsicalwednesday.  

Be sure to follow whimsicalstitch.com on FacebookPinterestInstagram, and Twitter.

If you like what you see on this blog, want to learn some very creative decorative stitches, and how to put them all together, whimsicalstitch.com sells stitch guides for seasonal Melissa Shirley designs.  18 guides are currently available and more are in the pipeline.

Enjoy!  And I hope you have a very, very happy Thanksgiving!

Step Up

The Victorian Step is a great, understated stitch with variations that make it work virtually anywhere.

My first thought for it is as a background stitch yet, with a few tweaks, it has a ton of potential for landscaping, clothing, sky, etc. This blog highlights three versions of the stitch and the stitched sample on Instagram is a another version of this stitch.  It works for almost anything you have in mind! 

The base stitch is a vertical stitch over two rows for three rows, drop two rows, and over four rows for one row.  Repeat.  


The graph is two colors to provide clarity.  This version is wonderful with two contrasting threads (say matte and metallic) of the same color value.  Another idea is to do two similar threads of slightly different color values (say cream and white or light gray and white) for a subtle background.  

The next variation skips a row between the blocks.  

This will work in an area where you want the shading to show through, especially if you use a thread that is slightly smaller than you would normally use for a canvas mesh size.  Think Rainbow Galleries Elegance on 13-mesh or Kreinik Very Fine Braid (#4) on 18-mesh.

The last variation works really well for landscaping as the accent adds texture and mild complexity. This is the version featured on Instagram, yet in the opposite direction.

These stitch diagrams, along with other #whimsicalwednesday and #smallspacesunday stitch diagrams, can also be found on www.pinterest.com/whimsicalstitch/whimsicalwednesday.  

Be sure to follow whimsicalstitch.com on FacebookPinterestInstagram, and Twitter.

If you like what you see on this blog, want to learn some very creative decorative stitches, and how to put them all together, whimsicalstitch.com sells stitch guides for seasonal Melissa Shirley designs.  17 guides are currently available and more are in the pipeline.

I hope you have the perfect space for these stitches and enjoy!

Small Space Cheating

Not all small space stitches are over one row.  Give me a small space stitch over two rows and I feel like I won the lottery.

Yup.  Over two rows in alternating directions for each horizontal row.  Makes me downright giddy.  The beauty of this stitch lies in its simplicity and its perfect symmetry.

When combined with a lighter weight thread, it makes a great open stitch.  Consider it for a nicely painted bush in the background or windows with a Kreinik Metallics Very Fine Braid (#4).

There are two stitched examples on whimsicalstitch.com's Instagram account for this stitch.  The first is a full coverage use of this stitch for a shutter on a 3D Melissa Shirley house.  The second is a lighter application of the stitch with a metallic for a window on a soon to be released Melissa Shirley canvas.  

This stitch diagram, along with other #whimsicalwednesday and #smallspacesunday stitch diagrams, can also be found on www.pinterest.com/whimsicalstitch/whimsicalwednesday.  

Be sure to follow whimsicalstitch.com on FacebookPinterestInstagram, and Twitter.

If you like what you see on this blog, want to learn some very creative decorative stitches, and how to put them all together, whimsicalstitch.com sells stitch guides for seasonal Melissa Shirley designs.  17 guides are currently available and more are in the pipeline.

I hope you have the perfect space for this stitch and enjoy it!

Just Another Brick in the Wall

Stumbling upon this stitch in my stash of fruit pillows reminds me of the beauty of full coverage stitches.  

While I am a big fan of open stitches, especially for backgrounds, there are times when only a full coverage stitch will do.  This stitch, named "Brick Wall*," is a great option for those occasions.

It's a rectangle within a rectangle.  But the creative dissection of the outer rectangle is what makes it so interesting.

I may be predictable but, yes, matte thread for the gray lines and metallic thread for the yellow lines.  

Something to consider adjusting is the weight of the yellow thread.  This could make a very interesting ground cover or table top with two matte threads with the yellow lines being a much lighter weight matte thread.

The biggest challenge with this stitch is compensating the gray lines, especially when working around adjacent outer rectangles.  

What helps me through the compensation is to look at the outer rectangle immediately above or adjacent to where I am trying to compensate.  The tops and bottoms of adjacent rectangles have stitches going in the same direction, highlighted above by the horizontal black arrow.  The sides of adjacent rectangles have stitches going in opposite direction, highlighted by the black vertical arrow.  The yellow lines are easy as they are always in the same direction.  I hope this helps!

This stitch diagram, along with other #whimsicalwednesday and #smallspacesunday stitch diagrams, can also be found on www.pinterest.com/whimsicalstitch/whimsicalwednesday.  

Be sure to follow whimsicalstitch.com on FacebookPinterestInstagram, and Twitter.

If you like what you see on this blog, want to learn some very creative decorative stitches, and how to put them all together, whimsicalstitch.com sells stitch guides for seasonal Melissa Shirley designs.  17 guides are currently available and more are in the pipeline.

I hope you have the perfect space for this stitch and enjoy it!

* Thank you to Suzy Murphy, of Suzy's Portable Stitches, for helping me discover a name for this stitch.


Bling!

If there is a real, adult name for this stitch, I have no clue.  I call it the Bling Stitch because the ratio is two metallic threads and one matte thread.  Yum!  That's the way I learned it and the way I always return to it, tho the possibilities are far greater than that.

Now the stitch.

The way I learned it, the dark gray lines were a matte thread while the light gray lines and the aqua crosses were two different metallic threads.  One of the many things I loved about this stitch was the color variations made possible by using three different threads.

Imagine white matte thread with a silver metallic for the light gray line and a red metallic cross stitch.  How about a matte thread with two separate metallics threads all in related color values?  For Halloween, try a black matte thread with an orange metallic for the light gray line and a purple or lime green cross stitch.  The stitched sample on Instagram is a red matte thread with a red metallic in between and the crosses are a black metallic.

The possibilities are endless.  And fun.

This stitch diagram, along with other #whimsicalwednesday and #smallspacesunday stitch diagrams, can also be found on www.pinterest.com/whimsicalstitch/whimsicalwednesday.  

Be sure to follow whimsicalstitch.com on FacebookPinterestInstagram, and Twitter.

If you like what you see on this blog, want to learn some very creative decorative stitches, and how to put them all together, whimsicalstitch.com sells stitch guides for seasonal Melissa Shirley designs.  17 guides are currently available and more are in the pipeline.

I hope you have the perfect space for this stitch and enjoy it!

An Oldie But a Goodie

Today's #smallspacesunday is going retro.  Allow me to re-introduce you to the Upright Cross.

Click on the image to see on whimsicalstitch.com's Pinterest account. Visit pinterest.com/whimsicalstitch/whimsicalwednesday for a library of all #whimsicalwednesday and #smallspacesunday stitch diagrams.

Click on the image to see on whimsicalstitch.com's Pinterest account. Visit pinterest.com/whimsicalstitch/whimsicalwednesday for a library of all #whimsicalwednesday and #smallspacesunday stitch diagrams.

Click on the image to see on whimsicalstitch.com's Instagram account. Visit instagram.com/whimsicalstitch to see a library of stitched samples for select #whimsicalwednesday and #smallspacesunday stitch diagrams.

Click on the image to see on whimsicalstitch.com's Instagram account. Visit instagram.com/whimsicalstitch to see a library of stitched samples for select #whimsicalwednesday and #smallspacesunday stitch diagrams.

It's clean, straightforward, and perfect for virtually any small space.  The ONLY thing to remember is to do the vertical stitch for each pair first, ending with the horizontal stitch on top.  And, before you ask...yes.  That annoying single over one on the vertical or horizontal compensation stitch is essential for a complete and clean stitched area.

Based on what thread you select this stitch can add texture, resulting in a wide variety of uses.  The most obvious uses are small space clothing, baskets, and food.  That said, with a "thicker" thread, it's a fantastic stitch for nature, including trees, bushes, leaves, and small flowers.  

You can dress it up by alternating matte and metallic threads on rows or alternate colors on rows.  Again, the only limit is your imagination.

This stitch diagram, along with all other #whimsicalwednesday and #smallspacesunday stitch diagrams, can also be found on a Pinterest board here. Be sure to follow whimsicalstitch.com on FacebookPinterestInstagram, and Twitter.

IIf you like what you see on this blog, there's more: Mary’s Whimsical Stitches Volume 1 is a contemporary how-to collection of more than 250 stitches for stitchers regardless of skill level. The book includes updated and sequenced diagrams from this blog, all-new stitches, and a chapter on the basics of needlepoint; Mary’s Whimsical Stitches Volume 2 features chapters on Balanced, Beading, Diagonal, Layered, Oblique, Small, and Straight stitches.

Also, you can download for free the first chapter from my first book which covers basic needlepoint stitches and stitch compensation techniques along with new top-line information on needlepoint materials and tools, how to handle threads, and other helpful needlepoint resources.

whimsicalstitch.com also sells Stitch Guides and Stitch Concepts for Melissa Shirley Designs, Zecca DesignsSandra Gilmore, Purple Palm, Maggie, and Penny MacLeod, and many more. Click here to see the newest guides and click here to see the entire collection.

I hope you have the perfect spot for this stitch! Please enjoy! Have a wonderful #whimsicalwednesday!

A Note about Diagrams
I use color in diagrams to make them as clear as possible.  The primary function of different colored lines is to illustrate a stitch sequence.  For example, the layering of colors demonstrates you add them in that order.  They can also provide ideas on how to integrate additional threads (one line for each color).  Or, you can use the same thread for all color lines.  That's where I encourage you to use your imagination for the space you are stitching! 

Our Best Friend

Diamonds.  Duh.

I wrote about the Diamond Stitch in a recent #smallspacesunday post.  It's versatility goes way beyond a small space stitch.

I call this stitch the Large Diamond.  Imagine the gray lines as a matte thread and the aqua crosses as a metallic.  I share that info now because it helps demonstrate the control this stitch gives you. 

In the example above, the diamond is three rows both above and below the cross.  After you add the cross, it results in a moderate metallic accent.  If you want more of a metallic accent, consider doing only two rows above and below.  Or, if you want less metallic, consider doing four plus rows above and below.

The intersection alternatives provide even more ways to emphasize (or de-emphasize) the metallic.  This stitch can be so glamorous or understated, which makes it a great option for many spaces.  

You may notice the stitched sample on whimsicalstitch.com's Instagram page has four rows above and below the diamond.  This stitch is wildly flexible to fit your stitching contrast needs.

This stitch diagram, along with other #whimsicalwednesday and #smallspacesunday stitch diagrams, can also be found on www.pinterest.com/whimsicalstitch/whimsicalwednesday.  

Be sure to follow whimsicalstitch.com on FacebookPinterestInstagram, and Twitter.

If you like what you see on this blog, want to learn some very creative decorative stitches, and how to put them all together, whimsicalstitch.com sells stitch guides for seasonal Melissa Shirley designs.  17 guides are currently available and more are in the pipeline.

I hope you have the perfect space for this stitch and enjoy it!

More Darlingness

The basis for this stitch is called "Main Network of Four-Way Enlarged Hot Wheels."  I prefer "More Darlingness."  (Thank you to Ann Strite-Kurz for the stitch inspiration and apologies for the name change.)

The dark gray lines define the stitch concept.  The heart of the stitch exists in the large diamond center.  The yellow tied cross in the center is just a thought starter.  Consider Smryna Crosses, more diamonds, or leave it blank.  

In my stitched sample, I used a matte thread for the gray lines, a metallic for the yellow lines, and a single bead in the intersection to keep it clean and simple.  There are many alternatives for the intersection spot, including more beads, as illustrated at the bottom of the diagram.  Truly, the only limit is your imagination.  (The stitched sample can be found on whimsicalstitch.com's Instagram account.)

I discovered this stitch years ago and used it once for a solid colored background on a JP piece.  You really need a large space to pull it off.   The pillow still sits on my front window seat...I have yet to tire of it.  That's always a good thing.

This stitch diagram, along with other #whimsicalwednesday and #smallspacesunday stitch diagrams, can also be found on www.pinterest.com/whimsicalstitch/whimsicalwednesday.  

Be sure to follow whimsicalstitch.com on FacebookPinterestInstagram, and Twitter.

If you like what you see on this blog, want to learn some very creative decorative stitches, and how to put them all together, whimsicalstitch.com sells stitch guides for seasonal Melissa Shirley designs.  17 guides are currently available and more are in the pipeline.

I hope you have the perfect space for this stitch and enjoy it!

A Girl's Best Friend

The Diamond Stitch may not be the first stitch you think of for a small space, but it's a fun and versatile solution.

More often than not, the simplest of Diamond Stitches is the best for a small space.

Diamond Stitch.jpg

Don't freak out at the openness of the diagram.  Imagine the gray lines as a Frosty Rays, Fyre Werks, or Vineyard Silk.  The coverage is far better than the diagram illustrates.  With a lighter thread, such as Soy Lustre, Elegance, or Kreinik Metallics Very Fine Braid (#4), it works as a fantastic open stitch that highlights shading.

If you are using the Diamond Stitch as a small space stitch, filling the center of the diamond requires discretion.  You don't want to make it too busy and overpower the area.  Two quick ideas are an Upright Cross or a single bead.

As a small space stitch, I like to mix matte and metallic threads (my favorite combo) with similar color values.  I've also used two different colors...one as the diamond and one as the Upright Cross...to add color to an area or to relate the area to another section of the canvas. 

If you choose to add a single bead, remember the size of the bead will define the stitch.  A larger bead will draw attention to the area.  

These stitch diagrams, along with other #whimsicalwednesday and #smallspacesunday stitch diagrams, can also be found on www.pinterest.com/whimsicalstitch/whimsicalwednesday.  

Be sure to follow whimsicalstitch.com on FacebookPinterestInstagram, and Twitter.

If you like what you see on this blog, want to learn some very creative decorative stitches, and how to put them all together, whimsicalstitch.com sells stitch guides for seasonal Melissa Shirley designs.  17 guides are currently available and more are in the pipeline.

Enjoy!