Truth be told, most Tramme stitches qualify as small space stitches. However, I singled this background out as a small Tramme background because the stitched sample is an ornament I did many years ago.
The stitch is very straightforward.
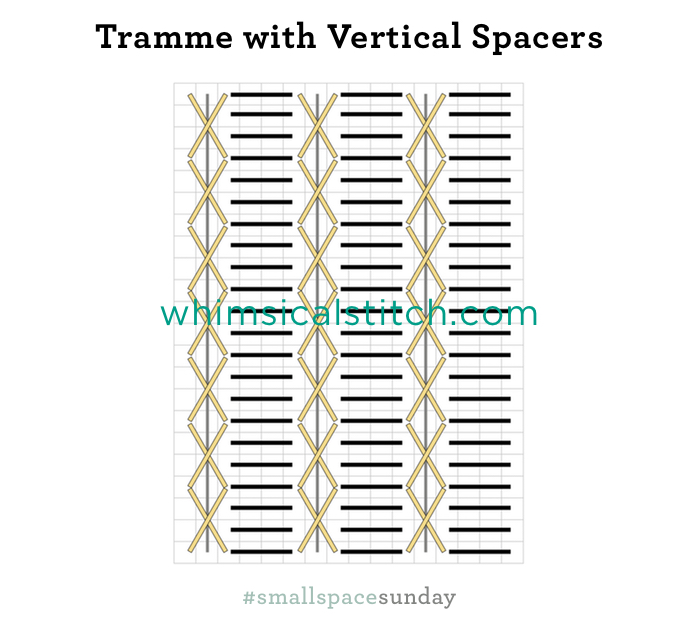
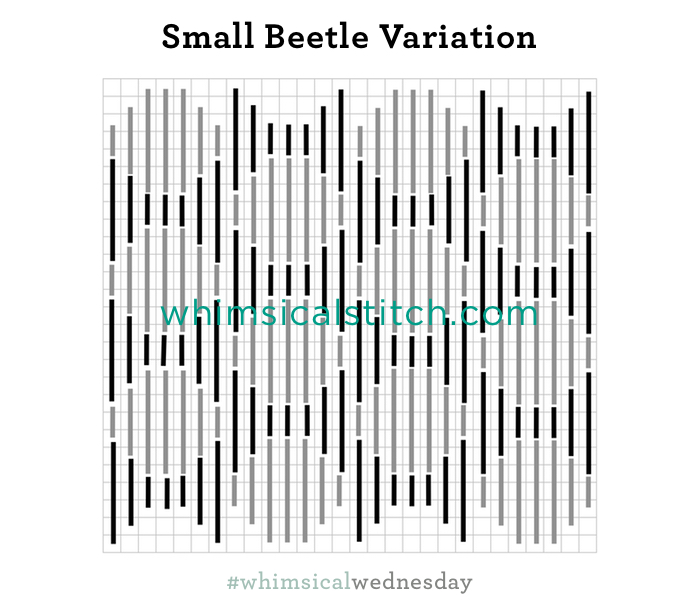
Sequence: 1. Dark gray vertical lines (aka base threads) 2. Yellow lines (aka accent threads) 3. Black lines
The vertical rows are over three to add a smoothness to the background and moderate the tramme rows in the stitch. That is a personal choice; you can do over more or fewer rows in your own piece.
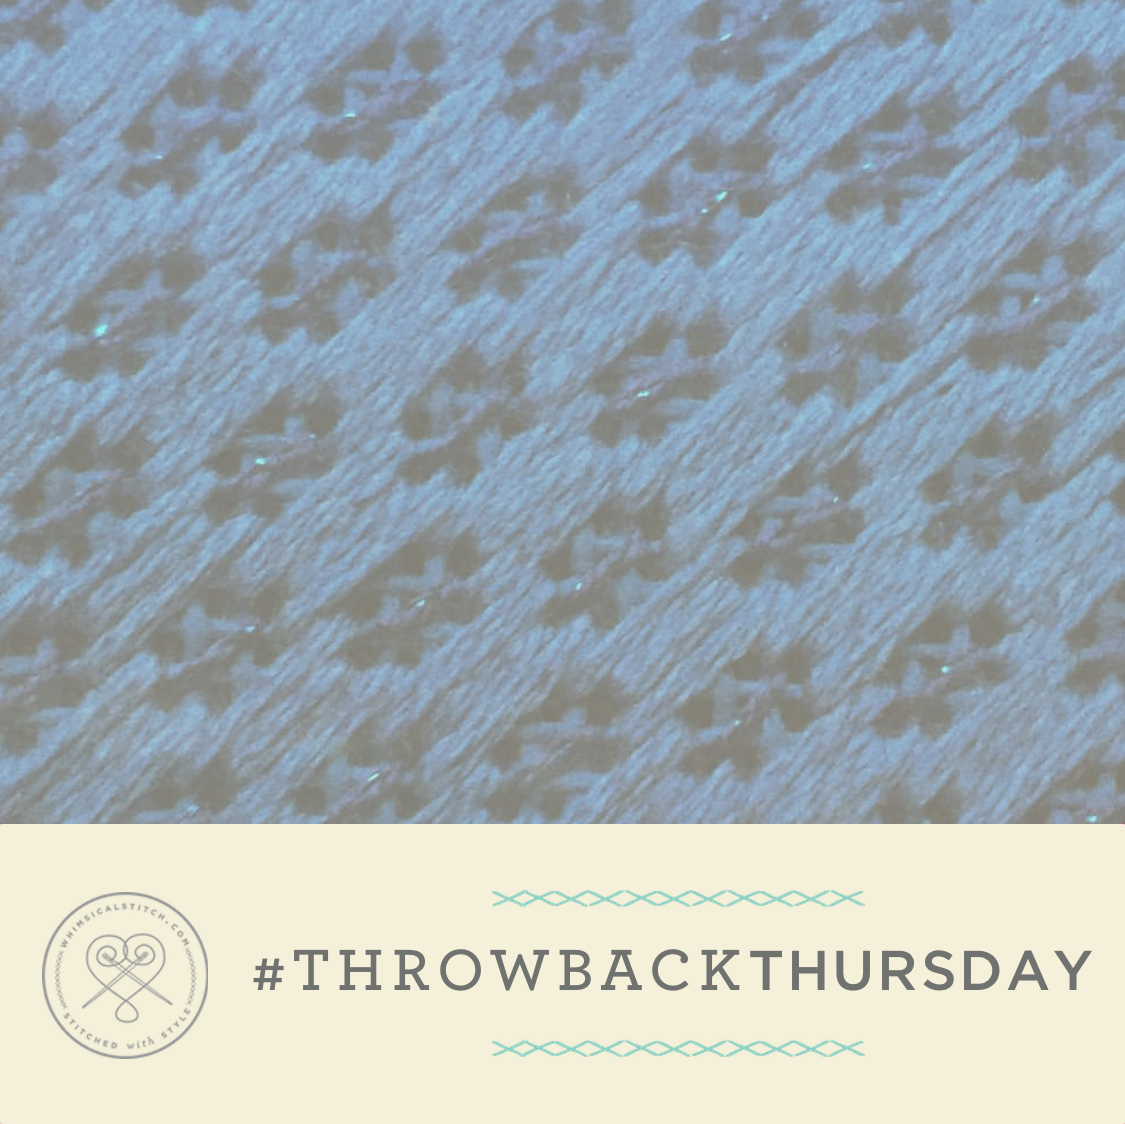
The stitched sample is a combination of three different finishes in the same color family.

44 Likes, 0 Comments - whimsicalstitch.com (@whimsicalstitch) on Instagram: "#smallspacesunday Small Tramme with Petite Very Velvet, DMC Pearl #8, and Kreinik Metallics Very..."
The threads are DMC Pearl #8, Very Velvet, and Kreinik Metallics Very Fine Braid, all in a very light blue. The Kreinik is a very subtle touch and may be hard to see. That was purposeful...the light weight creates a very subtle metallic pop to the background that I love.
The possible thread combinations and color combos are endless. This stitch makes a fantastic background (obviously), but would also be adorable on a pair of pants with the base thread of the tramme row in a contrasting color. It would serve well as a wallpaper, floor, rooftop (yes, again with the rooftops), or ground cover. Its strength lies in the tramme rows, which add definition and strength to the stitch. If you want a strong vertical (or horizontal) design element, this stitch is for you.
This stitch diagram, along with all other #whimsicalwednesday and #smallspacesunday stitch diagrams, can also be found on a Pinterest board here.
Be sure to follow whimsicalstitch.com on Facebook, Pinterest, Instagram, and Twitter.
If you like what you see on this blog, want to learn some very creative decorative stitches, and how to put them all together, whimsicalstitch.com sells stitch guides for Melissa Shirley Designs and Zecca Designs. 28 guides are currently available, including the newest Tea by the Sea, and more are in the pipeline.
I hope you enjoy this stitch and have the perfect spot for it! Enjoy!