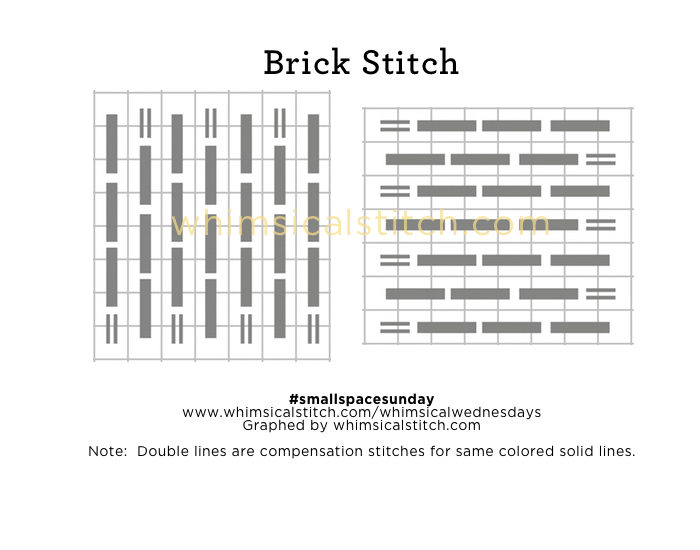
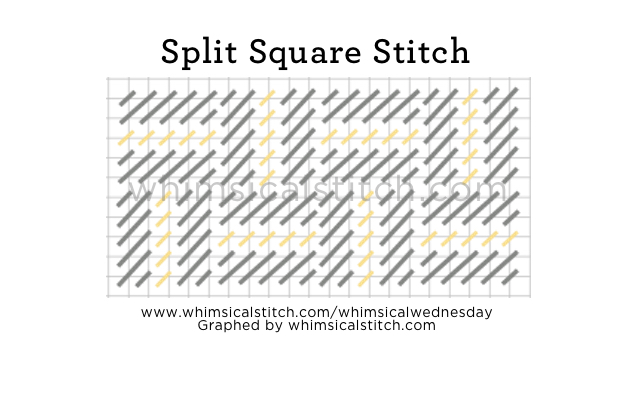
Woven Hungarian is one of my favorite stitches and, I confess, you will find it on virtually every piece I stitch. It's a great stitch for large or small spaces, yet what often is overlooked is its scalability.
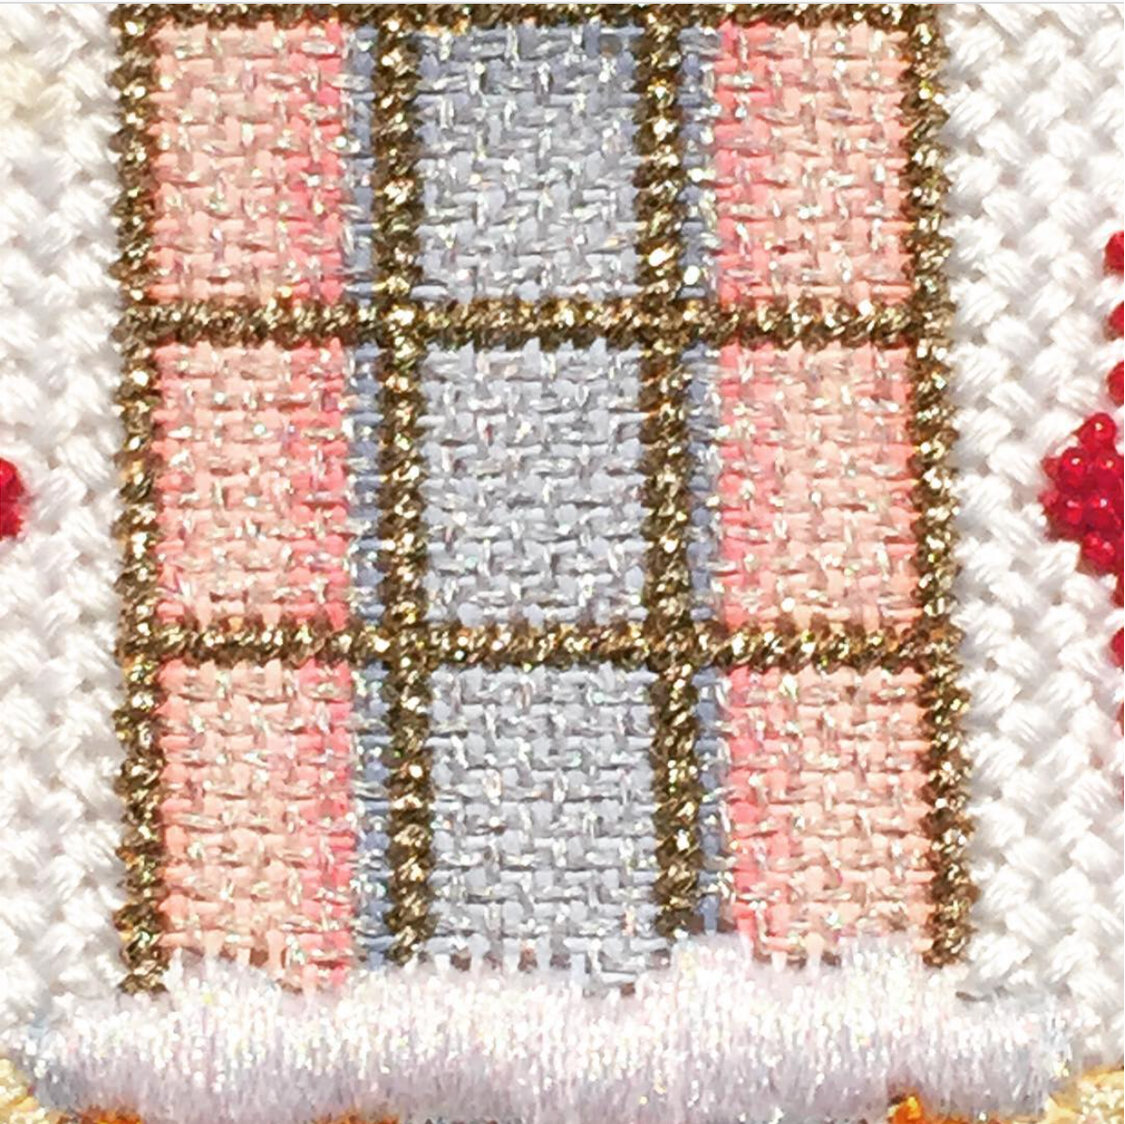
The base pattern includes alternating rows of sequences of three stitches going over 2-3-2 rows. Depending on how much shading you want to show through or how dressed up the stitch needs to be, the accent stitch can be a cross stitch, French Knot, bead (as diagramed), or empty.

Click on the image to see on whimsicalstitch.com's Pinterest account. Visit pinterest.com/whimsicalstitch/whimsicalwednesday for a library of all #whimsicalwednesday and #smallspacesunday stitch diagrams.

Click on the image to see on whimsicalstitch.com's Instagram account. Visit instagram.com/whimsicalstitch to see a library of stitched samples for select #whimsicalwednesday and #smallspacesunday stitch diagrams.
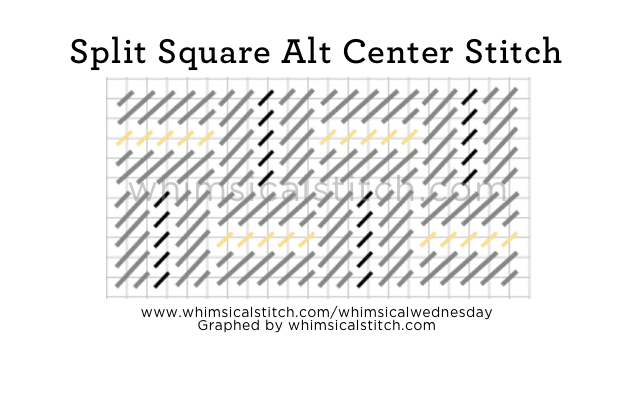
Things start to get interesting when you expand the stitch, especially for large spaces such as skies, water, and large spaces in what I call masterpieces, meaning very large dramatic canvases with large areas to fill.
The first expansion (below left) increases the length of the stitches from two and three rows to four and five rows. The last variation (below right) expands four and five rows to six and seven rows. And it's huge. And I love what it could do for a large canvas, especially a sky or gorgeous kimono. I have no other name for this, other than massive.

Click on the image to see on whimsicalstitch.com's Pinterest account. (Note: actual image on Pinterest may vary. It is the same stitch.) Visit pinterest.com/whimsicalstitch/whimsicalwednesday for a library of all #whimsicalwednesday and #smallspacesunday stitch diagrams.

Click on the image to see on whimsicalstitch.com's Pinterest account. (Note: actual image on Pinterest may vary. It is the same stitch.) Visit pinterest.com/whimsicalstitch/whimsicalwednesday for a library of all #whimsicalwednesday and #smallspacesunday stitch diagrams.
Goldilocks always thought the smallest object was the best but, in this case, the larger alternatives are more than fascinating.
This stitch diagram, along with all other #whimsicalwednesday and #smallspacesunday stitch diagrams, can also be found on a Pinterest board here. Be sure to follow whimsicalstitch.com on Facebook, Pinterest, Instagram, and Twitter.
IIf you like what you see on this blog, there's more: Mary’s Whimsical Stitches Volume 1 is a contemporary how-to collection of more than 250 stitches for stitchers regardless of skill level. The book includes updated and sequenced diagrams from this blog, all-new stitches, and a chapter on the basics of needlepoint; Mary’s Whimsical Stitches Volume 2 features chapters on Balanced, Beading, Diagonal, Layered, Oblique, Small, and Straight stitches.
Also, you can download for free the first chapter from my first book which covers basic needlepoint stitches and stitch compensation techniques along with new top-line information on needlepoint materials and tools, how to handle threads, and other helpful needlepoint resources.
whimsicalstitch.com also sells Stitch Guides and Stitch Concepts for Melissa Shirley Designs, Zecca Designs, Sandra Gilmore, Purple Palm, Maggie, and Penny MacLeod, and many more. Click here to see the newest guides and click here to see the entire collection.
I hope you have the perfect spot for this stitch! Please enjoy! Have a wonderful #whimsicalwednesday!
A Note about Diagrams
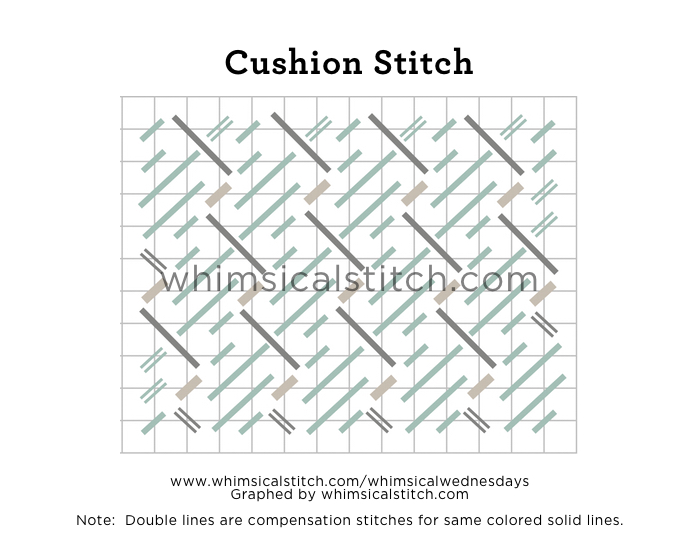
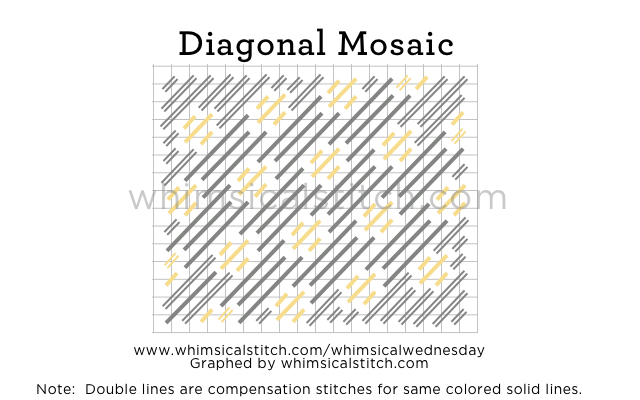
I use color in diagrams to make them as clear as possible. The primary function of different colored lines is to illustrate a stitch sequence. For example, the layering of colors demonstrates you add them in that order. They can also provide ideas on how to integrate additional threads (one line for each color). Or, you can use the same thread for all color lines. That's where I encourage you to use your imagination for the space you are stitching!