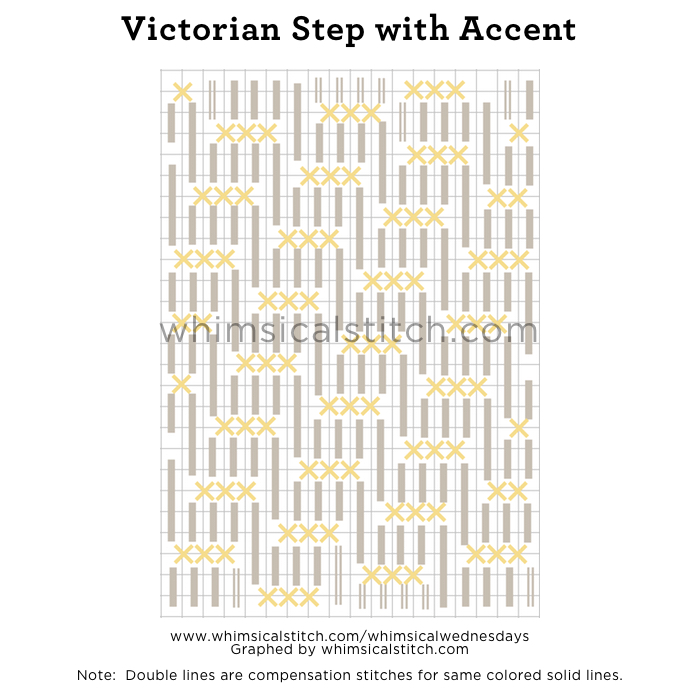
The Victorian Step is a great, understated stitch with variations that make it work virtually anywhere.
My first thought for it is as a background stitch yet, with a few tweaks, it has a ton of potential for landscaping, clothing, sky, etc. This blog highlights three versions of the stitch and the stitched sample on Instagram is a another version of this stitch. It works for almost anything you have in mind!
The base stitch is a vertical stitch over two rows for three rows, drop two rows, and over four rows for one row. Repeat.

The graph is two colors to provide clarity. This version is wonderful with two contrasting threads (say matte and metallic) of the same color value. Another idea is to do two similar threads of slightly different color values (say cream and white or light gray and white) for a subtle background.
The next variation skips a row between the blocks.

This will work in an area where you want the shading to show through, especially if you use a thread that is slightly smaller than you would normally use for a canvas mesh size. Think Rainbow Galleries Elegance on 13-mesh or Kreinik Very Fine Braid (#4) on 18-mesh.
The last variation works really well for landscaping as the accent adds texture and mild complexity. This is the version featured on Instagram, yet in the opposite direction.
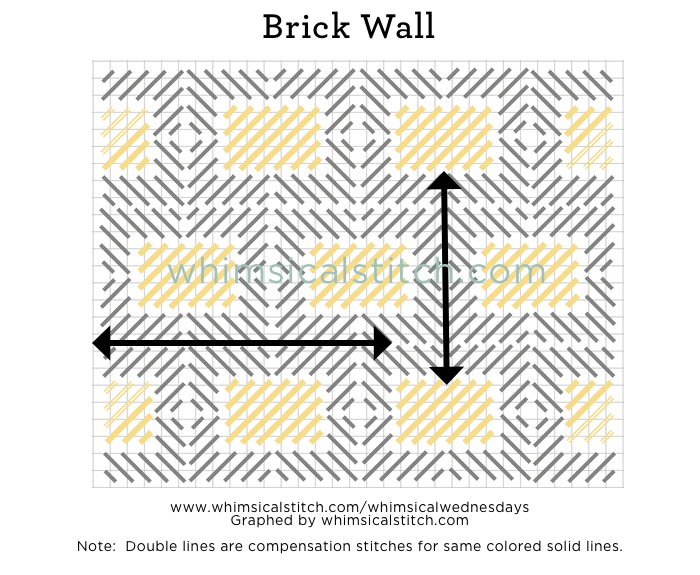
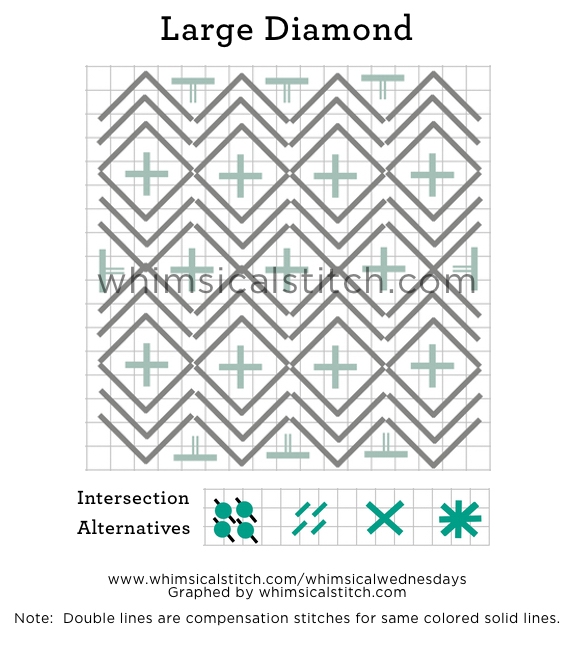
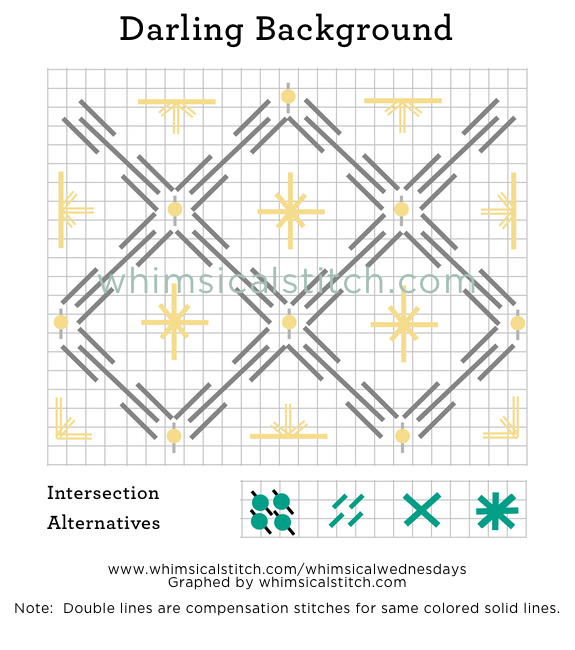
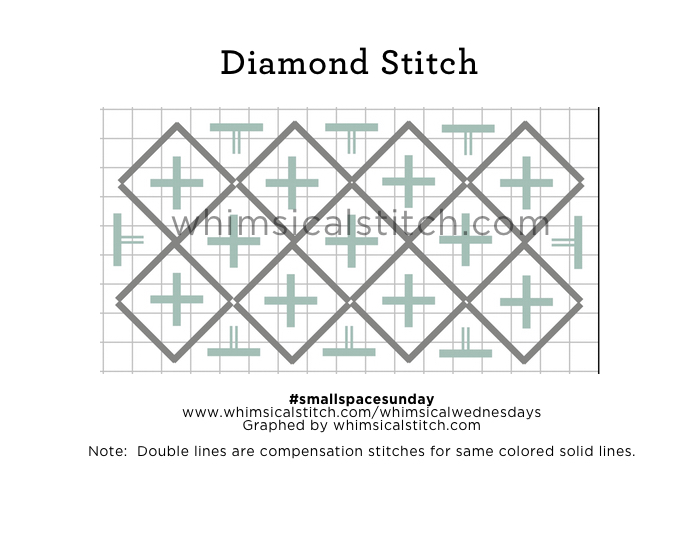
These stitch diagrams, along with other #whimsicalwednesday and #smallspacesunday stitch diagrams, can also be found on www.pinterest.com/whimsicalstitch/whimsicalwednesday.
Be sure to follow whimsicalstitch.com on Facebook, Pinterest, Instagram, and Twitter.
If you like what you see on this blog, want to learn some very creative decorative stitches, and how to put them all together, whimsicalstitch.com sells stitch guides for seasonal Melissa Shirley designs. 17 guides are currently available and more are in the pipeline.
I hope you have the perfect space for these stitches and enjoy!