
Today’s stitch comes from the same student’s work as our last stitch. And, I liked it so much, I’m also including a variation I’m using in a current project.
And a brief tangent for a quick update…volume 5 of Mary’s Whimsical Stitches will be launching very soon. I’m making some last-minute additions that I hope you will find helpful, so thank you for your patience!
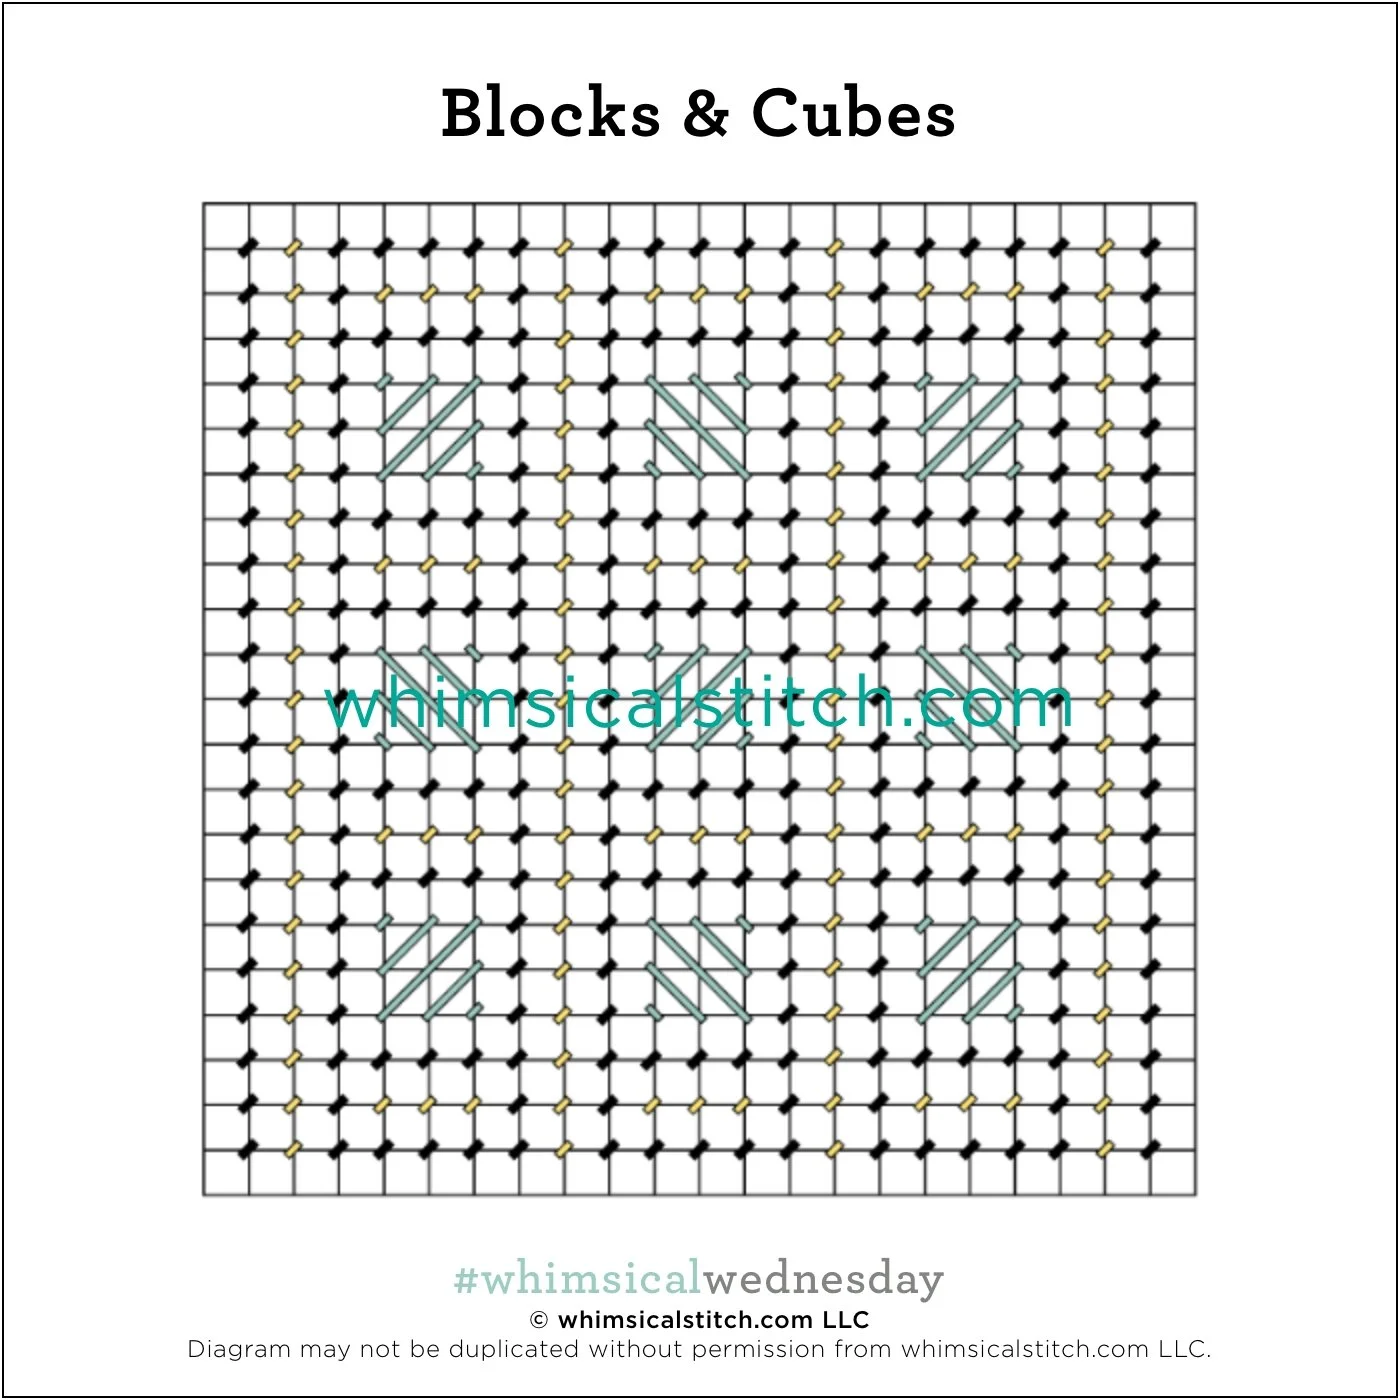
Click on image to see on pinterest. Visit pinterest.com/whimsicalstitch/whimsicalwednesday for a library of all #whimsicalwednesday and #smallspacesunday stitch diagrams.
Click the image to see #whimsicalwednesday and #smallspacesunday Stitched Sample Gallery on Instagram
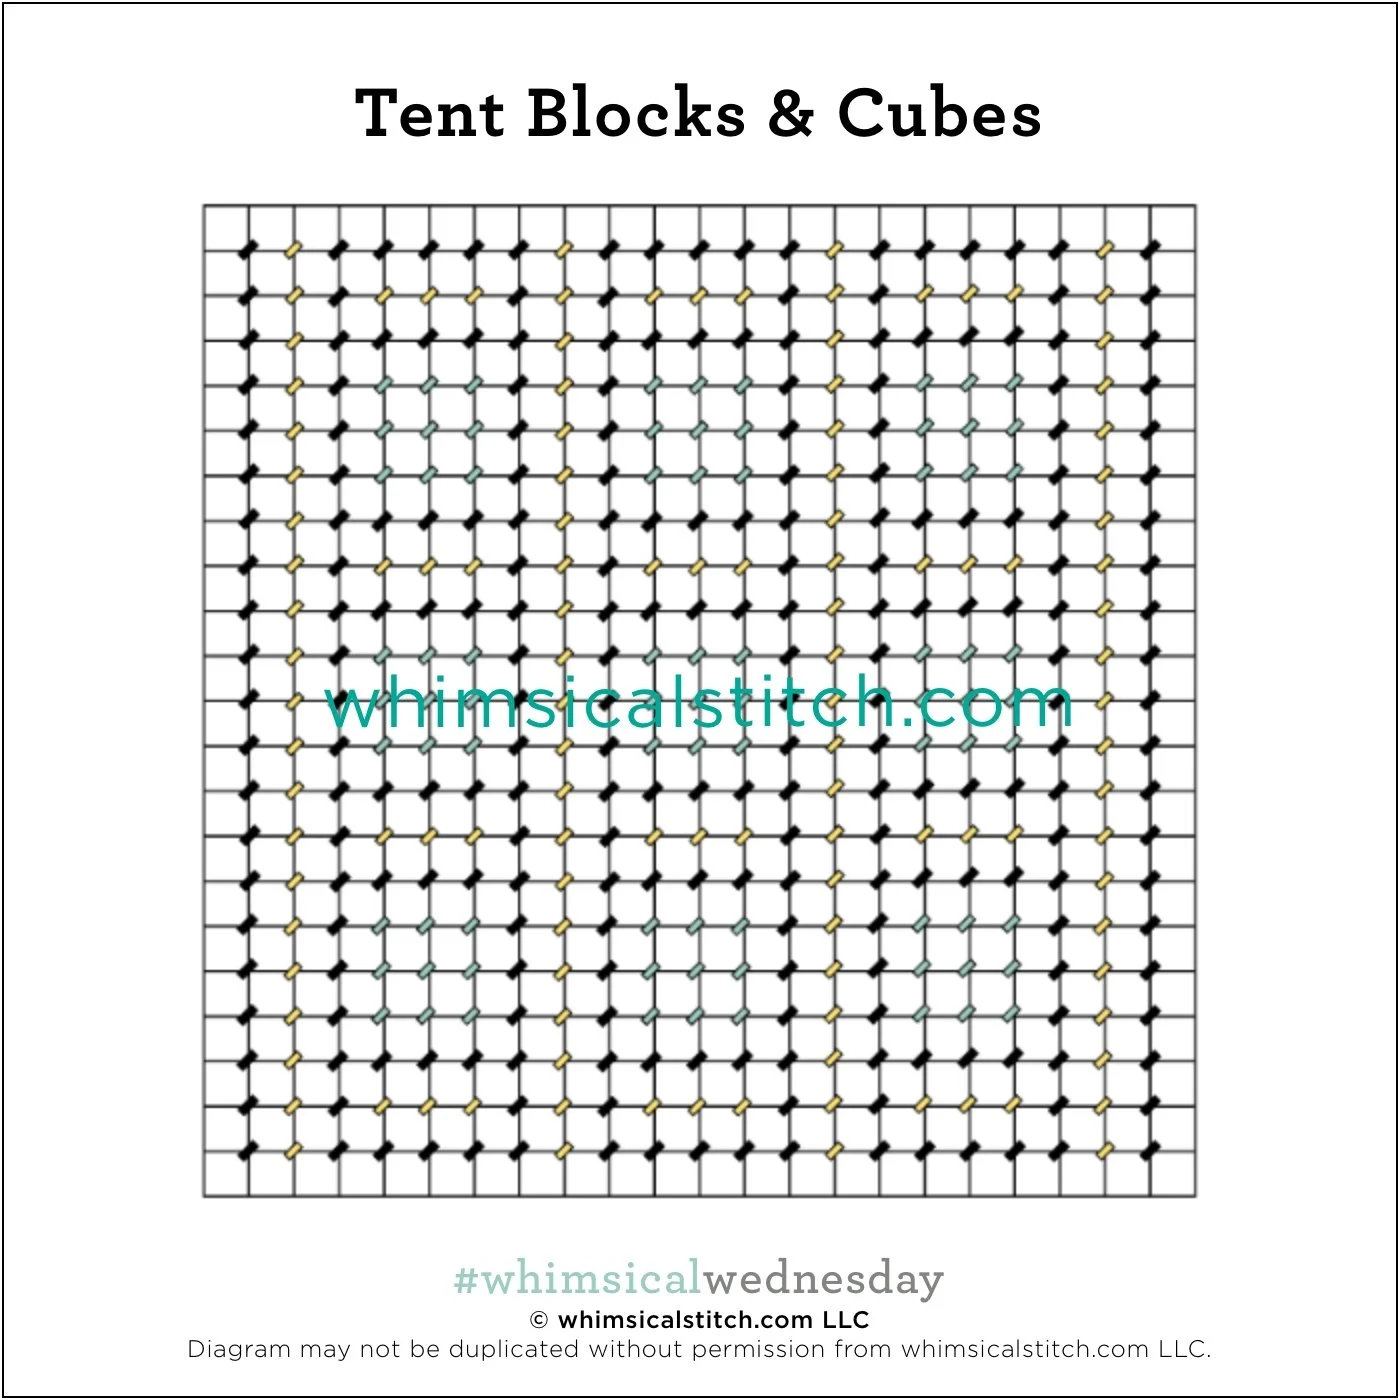
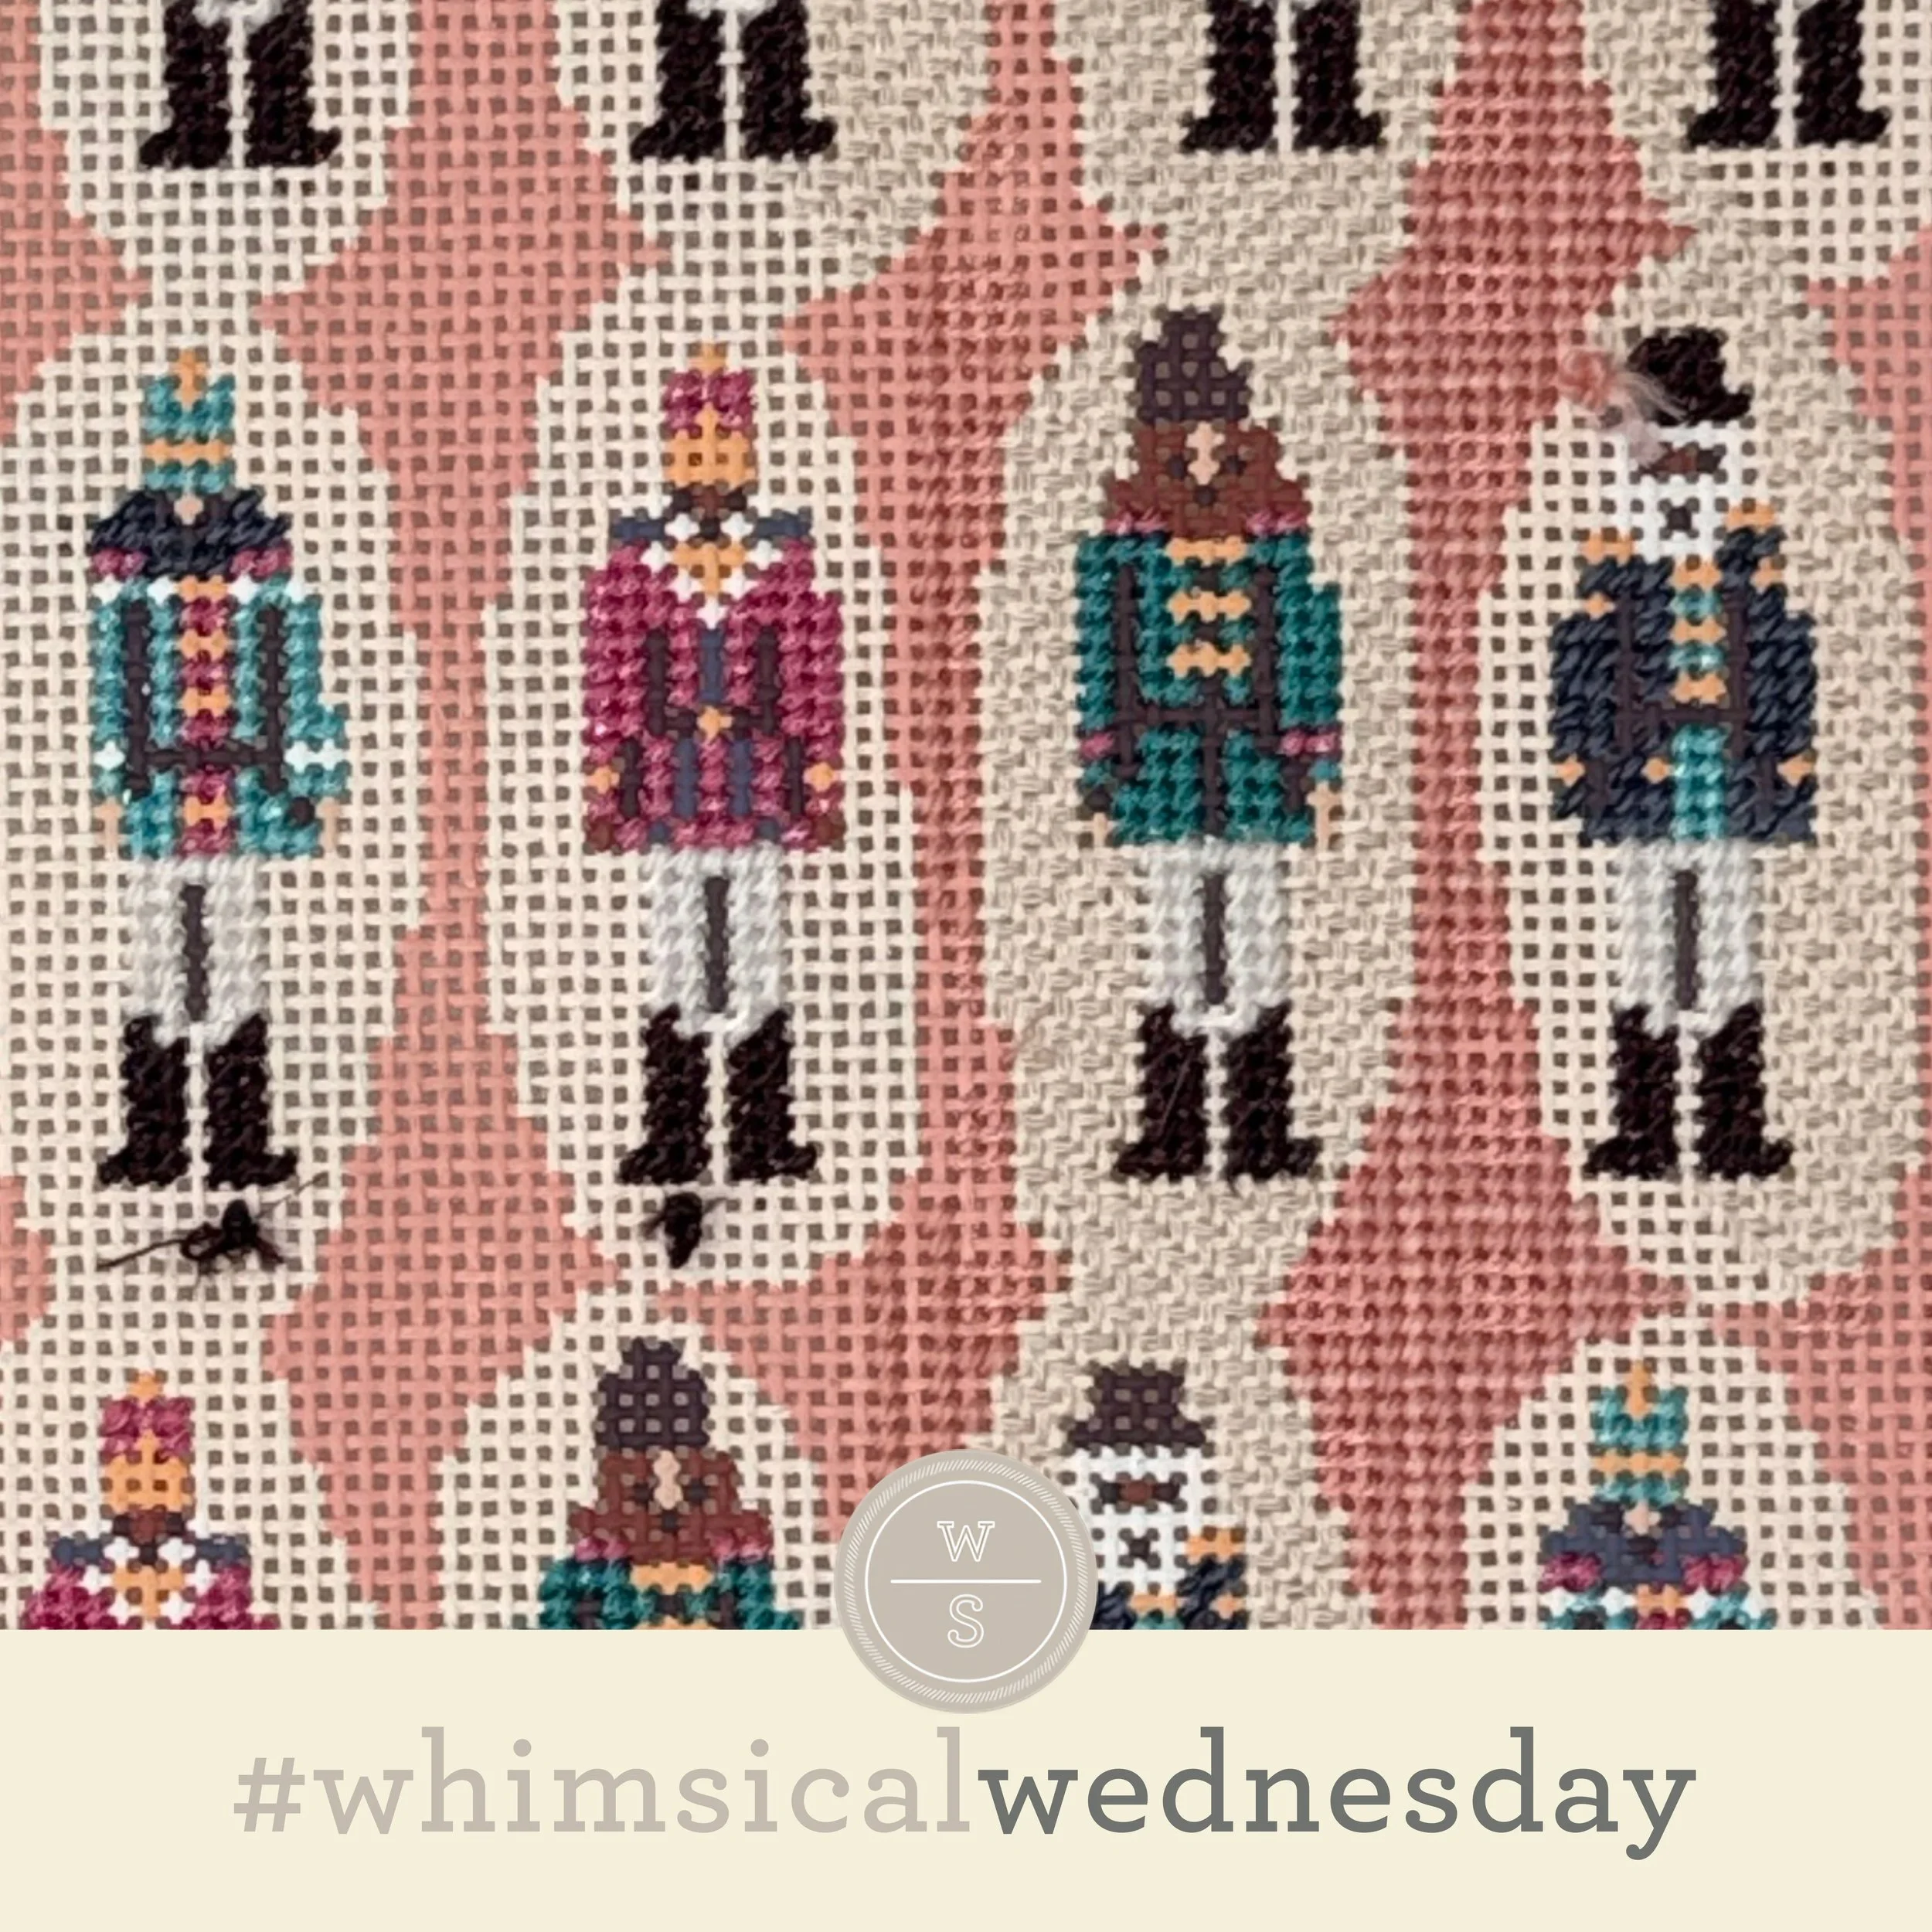
Today’s stitch is very similar to last week’s stitch, but a lot easier. Kinda.
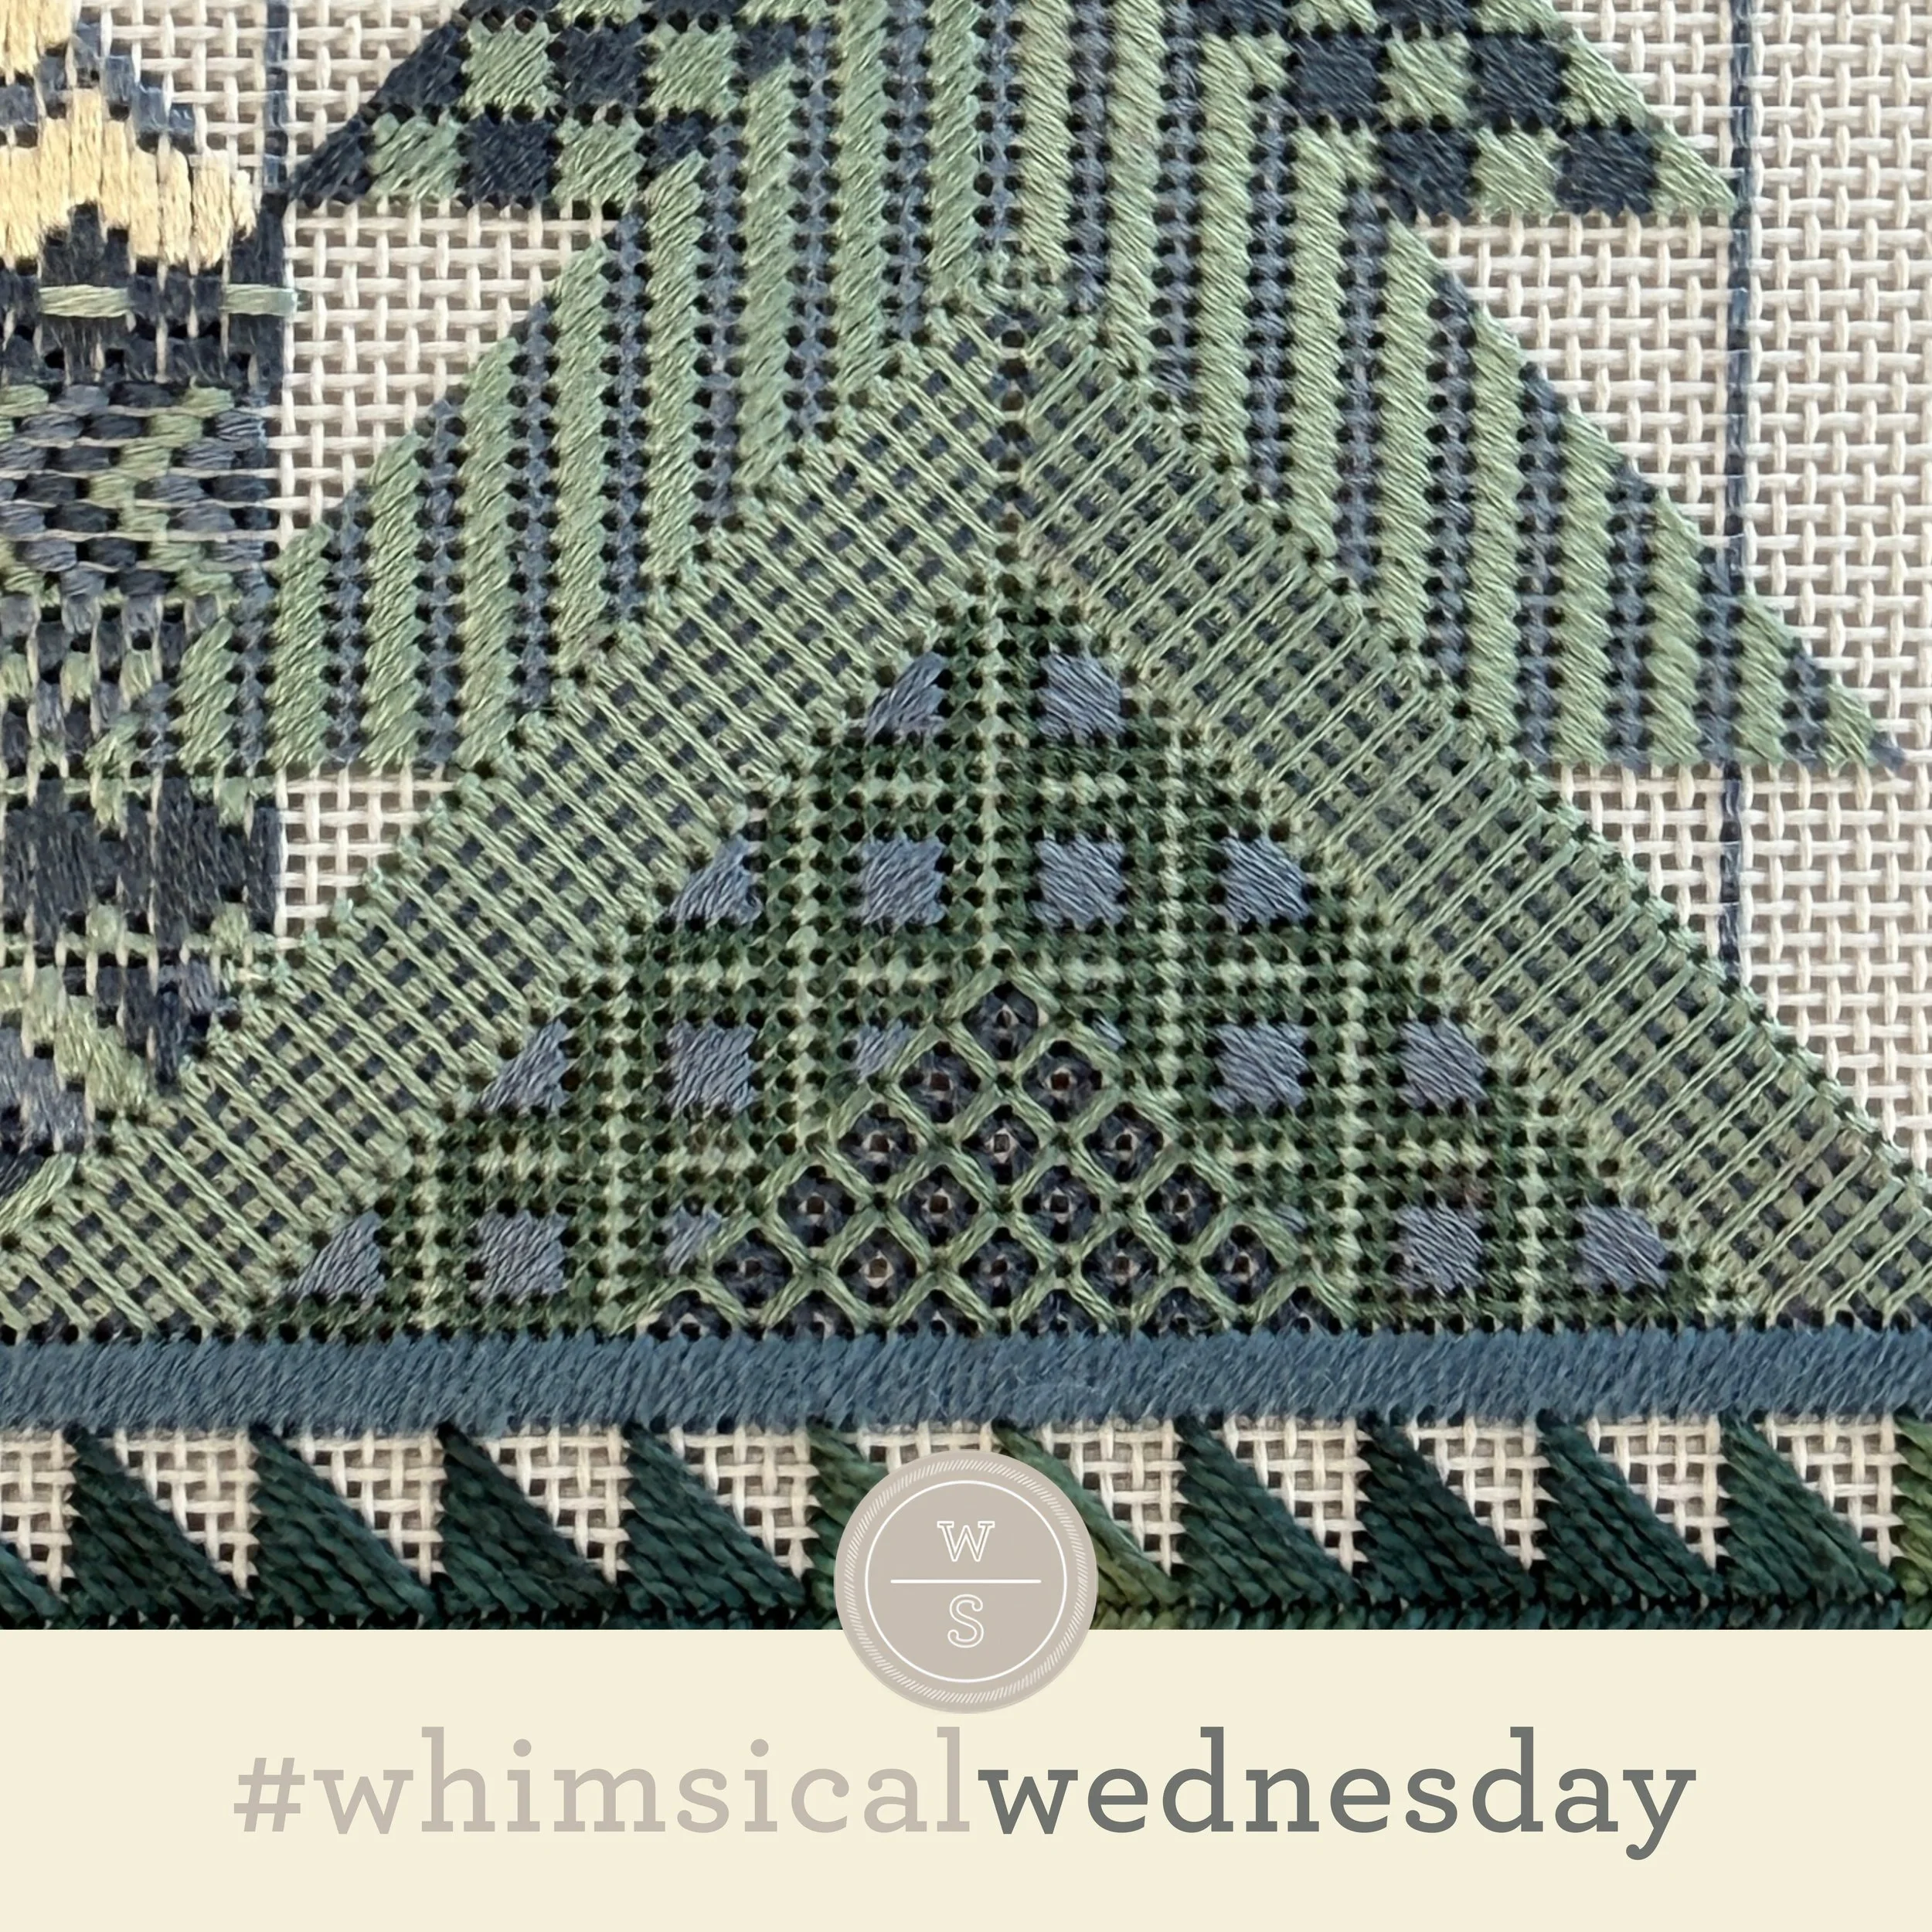
I love the contrasting colors in the original version. The blue centers really make the greens pop. The second sample is my current WIP from Mopsey Designs. I adjusted the 3X3 squares to all tent stitches because it just fit better. In the pink stitched sample, I’m using two shades of Vineyard Silk for the black and yellow lines and Radiance 18 for the aqua lines. It’s subtle, but I wanted that because there is so much color coming from the nutcrackers.
Naturally, I thought this would be easy. And, it became easier once I pulled out the first round of stitching and started again. Regardless of which version you use, I strongly recommend stitching the 3X3 squares first. That defines all of the vertical columns and will make your life that much easier. I suggest stitching the aqua lines first, followed by the vertical black and yellow lines, and then filling in the horizontal rows in between the vertical columns.
Have fun with it! (And now back to work on volume 5.)
A Note about Diagrams
I use color in diagrams to make them as clear as possible. The primary function of different colored lines is to illustrate a stitch sequence. For example, the layering of colors demonstrates that you add them in that order. They can also provide ideas on integrating additional threads (one line for each color). Or, you can use the same thread for all color lines. That's where I encourage you to use your imagination for the space you are stitching.
Click on image to see the whimsicalstitch.com Stitch Library on pinterest.com. Includes all #whimsicalwednesday and #smallspacesunday stitch diagrams.
Evaluating Stitches for Your Project
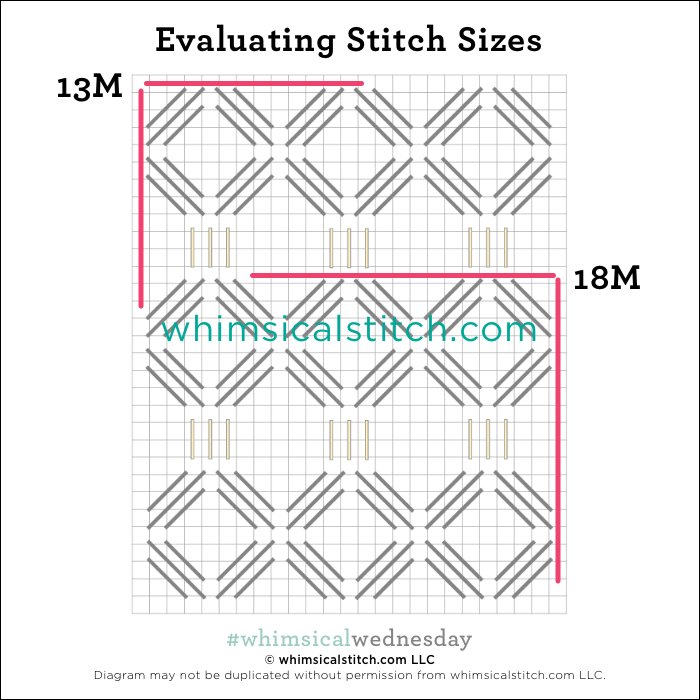
As you are auditioning stitches (from any stitch source), count the number of canvas threads on the diagram that match your mesh size. And there you have what an inch of the stitch will look like. Evaluate it against the area where you plan to use the stitch, then make your final decision. If you start integrating this step into your stitch selection process, you may be surprised at how many stitches you think are large are much smaller than you realize.
A Note about Stitch Names
I am absolutely loving the rising popularity of needlepoint, and if you are new to the blog, I want to take a second to chat about stitch names (again). TLDR: Don’t overthink them.
Most of the names for the stitches you see here are made up out of whole cloth. When I started needlepointing 30+ years ago, a teacher would draw or describe what she recommended, and off I went. Seriously. When I started my blog, an industry friend told me stitch names were crucial. I searched high and low for proper stitch names. What I found was stitches with no names or, even worse, identical stitches with two+ names from different sources. On top of that, some of my favorite stitches had generic names, such as Rug 1 and Rug 2. I quickly learned to focus on the diagrams, which are prettier. A stitch by any other name is still just as interesting!
There are some commonly understood stitch names, such as basketweave, continental, Scotch (3X3 and above squares), Mosaic (2X2 squares), Smyrna Crosses, and Hungarian (groups of diagonal stitches over 2-3-2 rows). It feels like it ends there. When naming stitches for my blog and books, I make every attempt to integrate generally accepted names, but also feel that a legible diagram is more important.
I’ve also learned that there is a very good chance that a stitch pattern that I come up with may not be new. But it is new to me. I spent almost an entire afternoon at a stitching friend’s home, poring through binders of stitches she gathered over five decades. Not only were many of them drawn by hand (whoa!), I discovered stitches that I thought were created decades later, with a different name, in a different presentation, from a different source. So, a stitch doesn’t belong to a single person or teacher. They are all part of a huge and decades-old network of really creative people.
Today’s stitch diagram, along with all other #whimsicalwednesday and #smallspacesunday stitch diagrams, can also be found on a Pinterest board here. Be sure to follow whimsicalstitch.com on Facebook, Pinterest, and Instagram.
More from whimsicalstitch.com
If you like what you see on this blog, there's more. Mary’s Whimsical Stitches is a series of four books offering contemporary how-to collections of more than 200 stitches (in each volume) for all stitchers, regardless of skill level. All books include updated and sequenced diagrams from this blog, plus a collection of all-new stitches from private lessons and other class projects. Visit here to find a needlepoint retailer that carries my books.
New to needlepoint or looking for a refresher? Please download a handy how-to guide covering basic needlepoint stitches and stitch compensation techniques, along with new top-line information on needlepoint materials and tools, how to handle threads, and other helpful needlepoint resources.